
Need a guide to create ads on Facebook? There are steps listed below to create an ad on Facebook.
After reading this article and following the same, you can post an ad on Facebook quickly.
Before creating an ad, you must have a business page on your Facebook account. Make one if you haven’t still.
There are different campaign objectives for ad creation on Facebook like conversions, traffic, reach, etc. The process is the same for creating an ad. However, there are different options for different objectives.
Let’s take an example of creating an ad on Facebook for getting traffic on your website. Once you know how to create that, I’m sure you will be able to create an ad for other objectives also.
Steps To Create Ads On Facebook For Getting Traffic On The Website
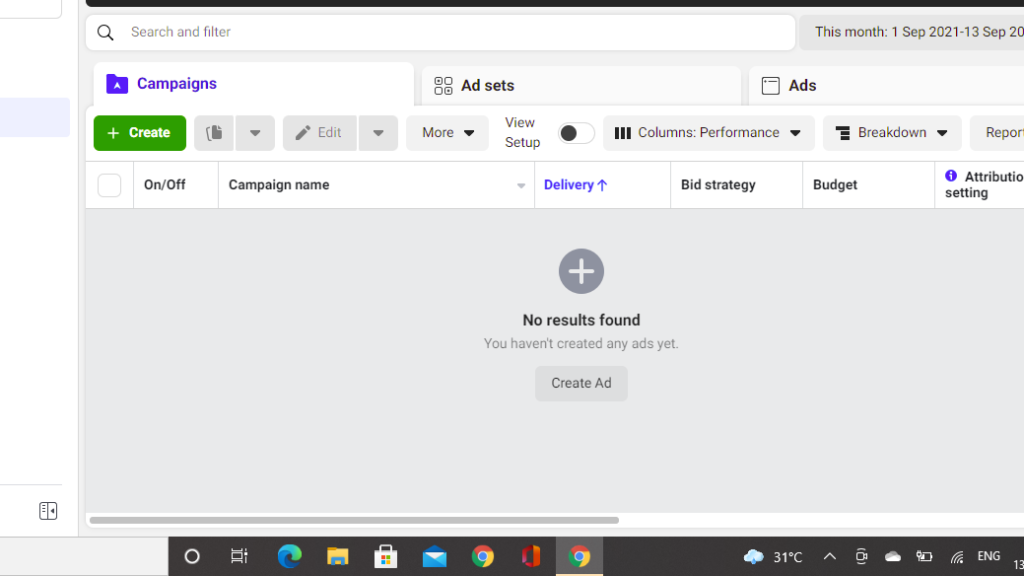
Go to www.facebook.com/adsmanager
Create Ads on facebook – Choose the Ad Type
Click on the “Create” button highlighting in green to start creating a new ad on Facebook.
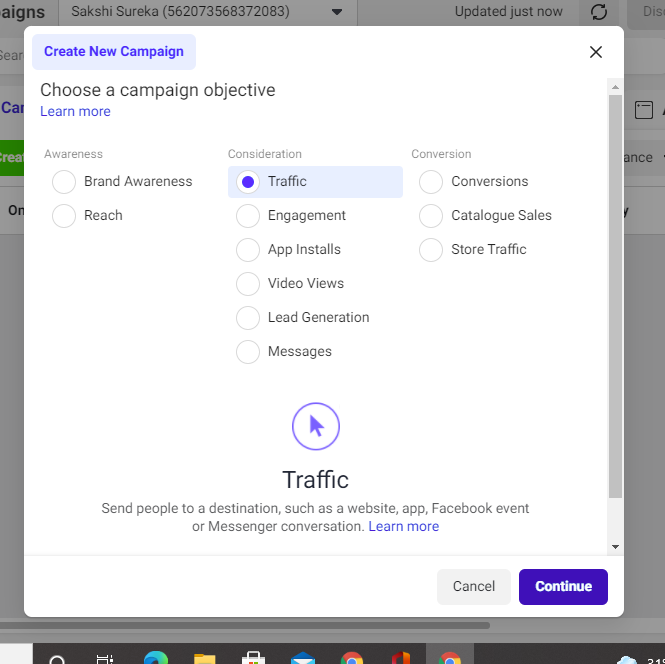
The next step is to choose your campaign Objective. You will get options like engagement, traffic, reach, conversions, app install, etc. Now here, you need to decide your goal and select the appropriate option. For instance, if your goal is to get traffic on your website, click on traffic. Click on the continue button.
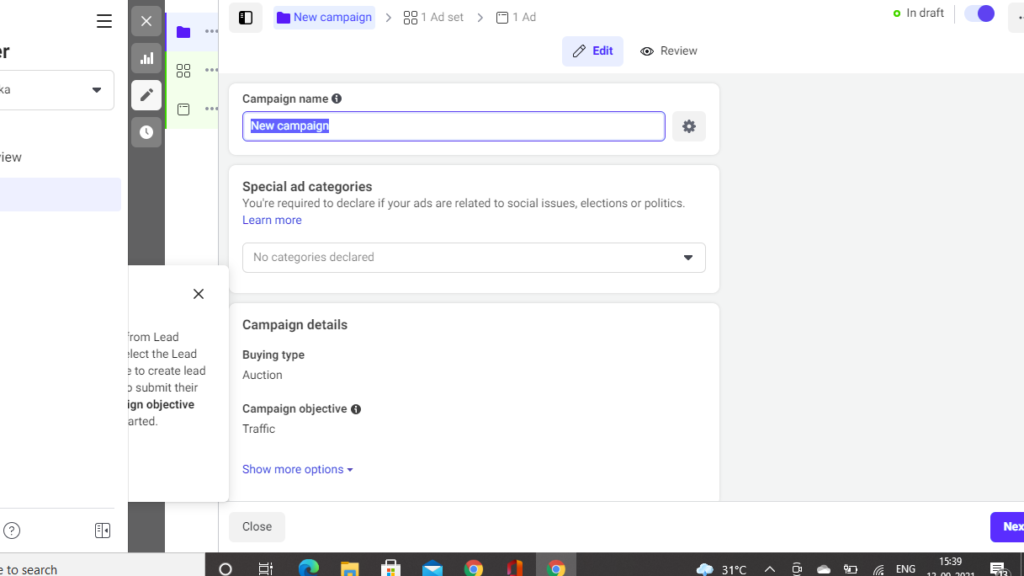
Third step is to give your campaign a name. Edit the campaign name and click on next.

If your goal is to get traffic on your website, click on the website.
Set a Budget
On the same page, scroll down, and you will see a section ” Budget and Schedule” to set a budget for your ad.
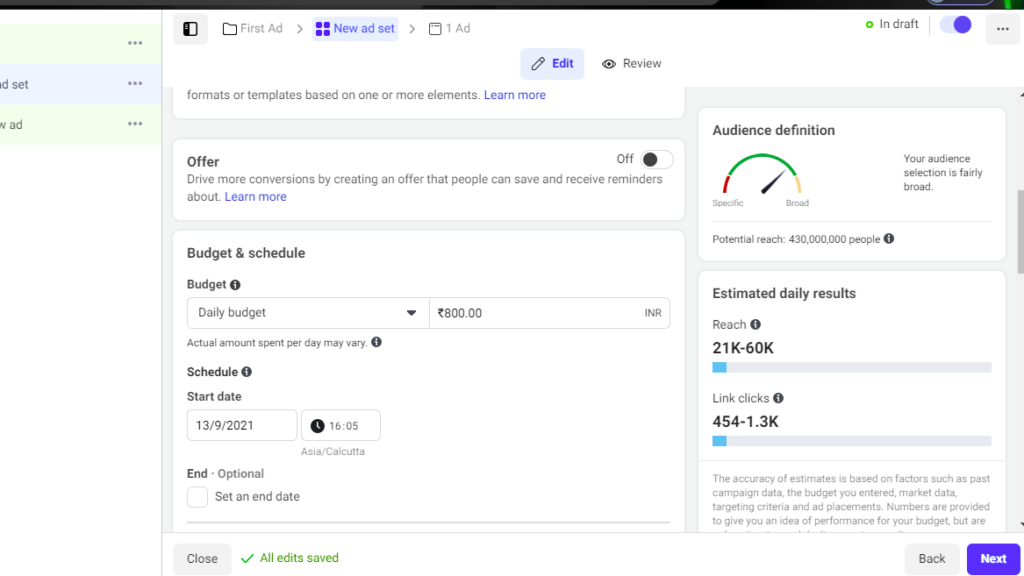
You get two options there: Daily budget and Lifetime budget. Please select one of them and enter the amount in front of the same.
If you have chosen the Daily budget, Facebook will charge the same amount for your ad daily. Also, set the start date and time under the “Schedule” section. Your ad will be posted on Facebook on the scheduled date and time.
Set The Audience
Scroll down, and you will see the “Audience” section on the same page. Here you need to select the audience that you want to target and might be interested in your business. By choosing the audience, this ad will reach your selected or targeted audience.
To set the audience:
- At first, select the location of the audience you want to target. You can choose more than one location.
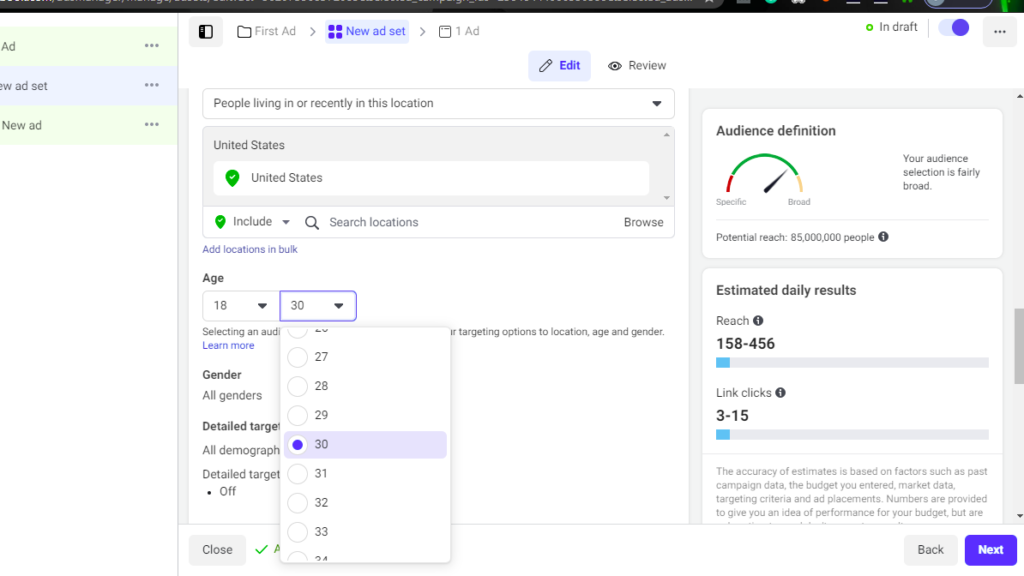
- Then set the age group of your audience. For instance, if you want to reach people of age between 18 to 30, select the same.
- Below, you will find an edit button to set the Gender group visiting your site. For instance, if you want only men visiting your site, select men.
- The next step is to set the “Detailed Targeting” section, which means choosing people interested in your business or your products. Click on the edit button in front of the same and click browse.
- You will get three options: Demographics, interests, and behaviors. Set these according to you. For instance, choose the shopping and fashion option under the “Interests” section if you have a shopping website.
- You also get the chance to “Exclude” any group of interests. You may add that as well.
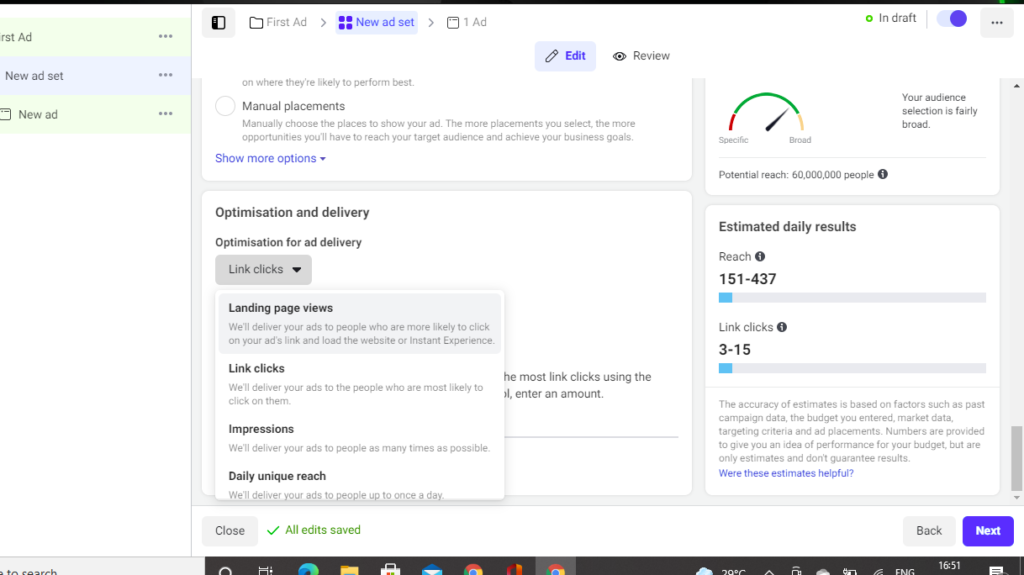
- The next step is to set Link clicks under the “Optimisation for ad delivery” on the same page. This option is for choosing what results do you want from your ad.
For instance, if you want people to visit your website, select “Landing page views“. Click on “Next“.
Designing the Ad
Once you have selected your targeted audience, here comes the creative part of your ad that is designing.
For designing your ad, you must have a Facebook page. Otherwise, it won’t allow you to design the same.
- Select your Facebook page under the “Identity” section.
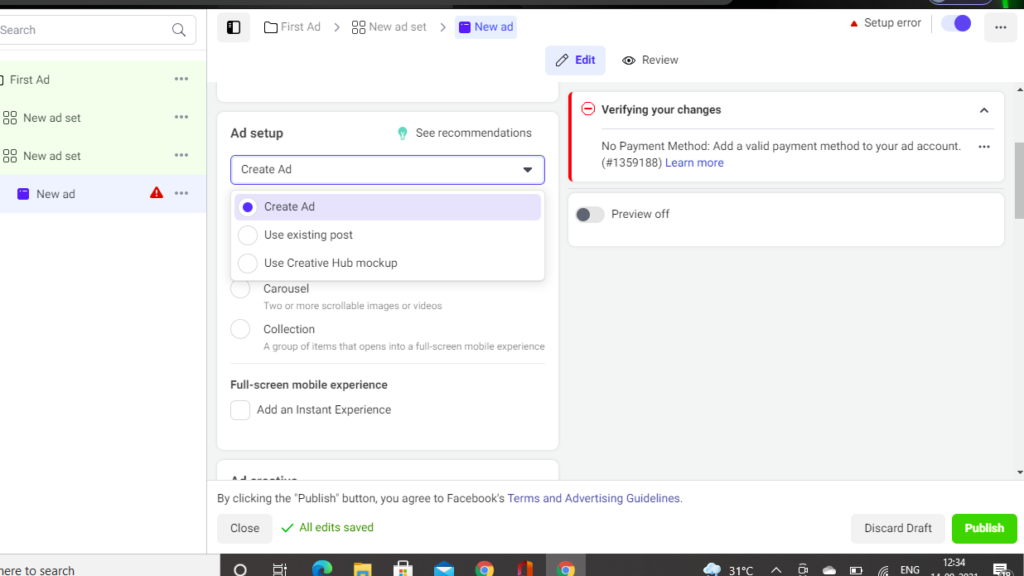
- Scroll down, and you will see the ” Ad setup” section. Choose from the given options. If you want to create a new ad post, click on ‘create an ad’. For using an existing post for the ad, click on ‘Use existing post’.
- Select the format you want for your ad, like image, video, carousels, etc.
- If you have selected the ‘Create Ad‘ option, scroll down to the ‘Ad creative‘ section. Here you need to design your ad. Steps to design your ad:
- Click on ‘Add media‘ and add the image or video. Tip: Use an attractive visual to stop eyeballs on your ad because that’s the first thing anyone notices.
- Enter text under the ‘Primary text‘ headline. Tip: Write something that describes the need of people? For instance: Looking for digital marketing courses?
- Enter the Headline and description (optional). Tip: Enter the text that conveys how useful your ad is for the audience.
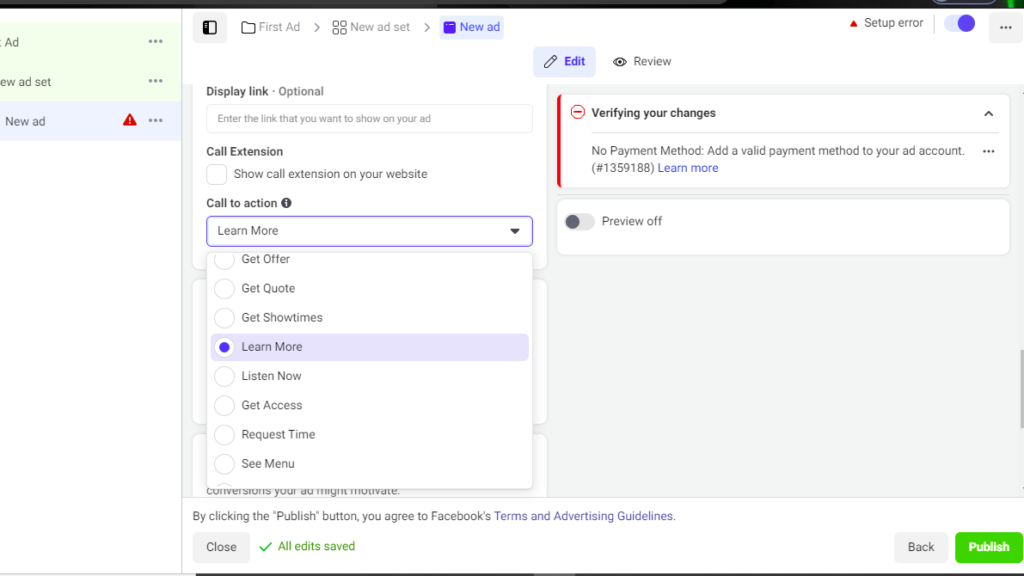
- Finally, adding a call-to-action to your ad. You need to enter the URL of your website where you want visitors to be taken by clicking on the action button. Then select the appropriate call-to-action button that you want to display on your ad.
Now, the procedure has come to an end. You can preview your ad on the right side of the same page.
Create Ads on Facebook – Final Step
If everything looks good, scroll down and click on the publish button to publish your ad.
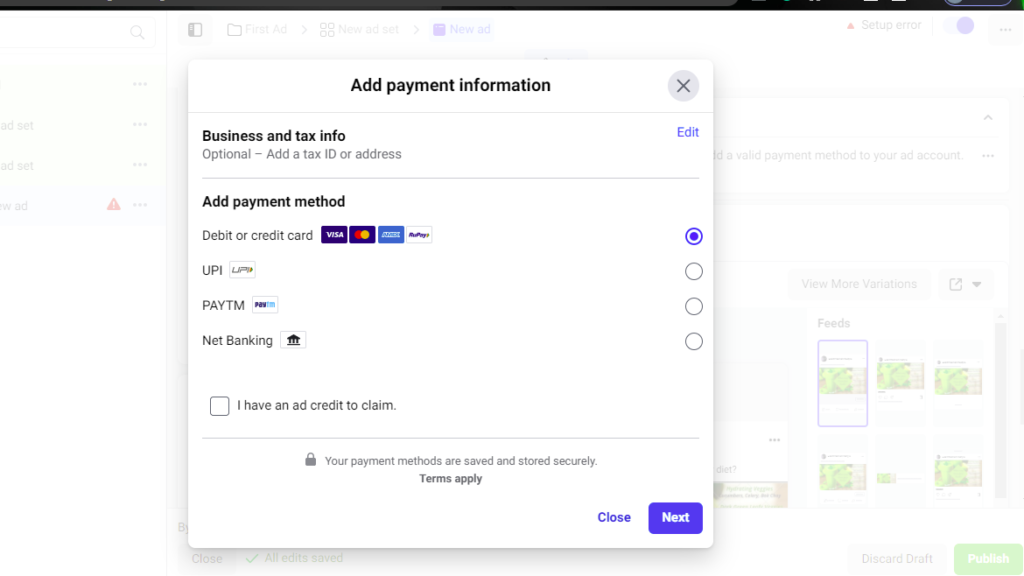
If you have not added any payment method before, you will get the option to add the same. Enter your card details and click on the ‘Save‘ button.
After adding your payment method, Facebook will automatically take the amount you have set from your saved payment method. Your ad will be published once reviewed by Facebook.
Scroll up and check on the top right side. You may see your ad is “in review” status. Facebook usually takes less than an hour to review your ad.
Once Facebook has reviewed it, Facebook will post your ad and update it to “Active” status.
Now your ad is live on Facebook, and that’s how you create it.
Re-check Your Created Ad
Do you want to check how your ad looks?
On the same page where you see the preview of your ad, click the drop-down button, and you will see an option ‘share a link‘. Click on it and then click copy.
Now open a new tab and paste it. Here you can see how your ad looks to other people on Facebook, and if someone clicks on it, it will take them to the destination you have added to your ad.
How to Check Results of Your Ad?
To check the results of your ad, go to www.facebook.com/adsmanager.
On the same page, you may check impressions (number of people to whom facebook has shown your ad), reach (number of people who have seen your ad), results (number of people who clicked on your ad) in front of your ad.
Also, you can change the image of your ad or edit the budget if you want to. For proceeding with this, select the ad you want to edit and click on the edit button above.
If you want to disable your ad, click on the “On/Off” button.
Wrap-Up
Now that you know how to create ads on Facebook, what are you waiting for?
You might have seen it looks quite difficult, but it’s simple in reality when you go and create one.
It’s just that you have to be clear with your objectives or goals and pick the right one. Only then you will get the best results from it.
Don’t forget to check the performance of your ads. Check them regularly and analyze them. This will help you to improve.